















Getting started / Waveform testing
To start using the Autel MaxiScope MP608, prepare a supported host, connect the scope by USB, select a suitable test, and confirm the measurement setup before capturing a signal. Begin with one channel and one clear diagnostic question.
This guide covers Windows installation, the basic connection sequence, and a beginner workflow. Named in-app controls below follow Autel's Android manual; Windows screens and other software versions may differ.
Your first-session checklist
- MP608 module and supplied USB 2.0 Cable V2.
- A compatible host and the correct MaxiScope software.
- Suitable leads and probes for the selected test.
- Vehicle service information and the relevant test instructions.
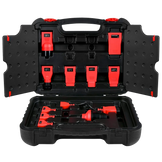
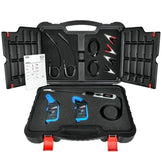
Still choosing your equipment? Check the MP608 kit and compatibility details before buying.
Read before making a connection. Autel's Android manual prohibits direct battery connection and requires a battery-rated differential isolating probe for battery-voltage measurements. It also warns against applying voltage to the scope ground. Follow the manual's grounding checks and all terminal ratings. A displayed voltage range is not permission to connect to any circuit.
1. Prepare your computer or compatible tablet
Windows PC setup
The quick guide specifies 64-bit Windows 10 Build 1809 or later, or 64-bit Windows 11. Its minimum requirements include 2 GB RAM, 2 GB free disk space, a 1280 × 720 display, and USB 2.0. Check its complete processor and graphics requirements before installation.
- Visit Autel's software downloads page and choose the MaxiScope download identified for MP608.
- Extract the downloaded package and run setup.exe.
- Follow the installer, select the destination folder, install, and finish.
Keep the software package matched to your device. Autel's download page also lists MP408 software, so check the model label.
Autel tablet setup
Confirm support for the exact tablet model. An Android operating system alone does not establish compatibility. Locate the MaxiScope application on the supported device and use the relevant software-update instructions.
2. Connect the MP608 and check its status
Use the supplied USB cable to connect the MP608 to the host. Connect the appropriate test lead to the scope input, open MaxiScope, and select the intended test. Make vehicle-side connections only after reviewing that test's instructions.
The quick guide describes red during self-test followed by green when connected; flashing green indicates communication or updating.
Before moving on, check that you are working with the connected instrument. A demonstration screen is useful for learning controls, but it cannot tell you what is happening on the vehicle.
3. Choose one question and one suitable test
Start with a narrow question such as, “Does this sensor signal remain consistent when the symptom appears?” This gives the capture a purpose and helps you decide where to measure, which conditions to reproduce, and what evidence to keep.
On the documented Android interface, open Presets, choose a test, and read its connection guidance before probing. Download the case if prompted. Reference traces are examples, not your live measurement.
For a first session, choose a straightforward, low-voltage sensor test covered by the guidance and vehicle service information. Do not begin with ignition, mains, or high-voltage vehicle circuits.
4. Match the channel settings to your connections
On Android, enable the connected input in Channel Control and match the probe setting to the actual accessory. Use Start/Stop to control acquisition. Auto Scale can help frame the signal; its automatic time-base selection applies to periodic signals.
Before interpreting the trace, understand these three settings:
- Voltage scale: how much signal height each vertical division represents. A trace that runs beyond the display is not ready for interpretation.
- Time base: how much time each horizontal division represents. A narrow window shows detail; a wider window shows the event's context.
- Probe scaling: how the accessory's output is converted into the displayed measurement. Incorrect scaling can produce a plausible shape with incorrect values.
Automatic setup is a starting point. Always check that the chosen settings fit the test and that the waveform is not clipped or compressed into an unreadable line.
5. Stabilize the capture, then reproduce the symptom
A trigger tells a scope which event should organize the capture. For a repeating signal, a suitable edge and threshold can make successive cycles easier to compare. Choose settings that the expected signal can actually satisfy.
Change one setting at a time. If you alter the time scale, voltage scale, and trigger together, it becomes harder to know which change fixed the display. Once the trace is readable, reproduce the relevant operating condition using the vehicle manufacturer's test procedure.
Record what you did: key state, engine state, test location, and whether the symptom was present. Without that context, two different-looking captures may simply reflect different test conditions.
6. Save a capture you can use later
On Android, use File → Save waveform to retain the capture. Available formats include oscilloscope data, text, and Excel.
Give the file a meaningful name and keep a short test note. For example: Vehicle_Sensor_SymptomPresent_Test01. Include the probe setup and measurement point in your records. If you repeat the test after a repair, use comparable settings and conditions so the comparison is meaningful.
Quick troubleshooting
| What you see | What to check first |
|---|---|
| No connected scope | Confirm host compatibility, the correct application, and a secure USB connection. |
| A flat trace | Check the selected channel, acquisition state, connections, and whether the circuit should currently produce a changing signal. |
| A waveform that will not settle | Review the trigger source and threshold, then check for a loose connection or unstable operating condition. |
| Unexpected amplitude | Check probe scaling, units, measurement point, and vertical range before judging the component. |
| A trace that looks different from the example | Compare vehicle configuration and test conditions. A reference mismatch alone is not a diagnosis. |
Beginner questions
Should I use all four channels immediately?
Start with one. Add another only when it helps answer a relationship question. A simpler capture makes incorrect settings and connections easier to spot.
Can I use an ordinary Android tablet?
The official quick guide limits the Android application to supported Autel tablets. Check your exact model rather than relying on screen size or operating system.
What makes a first test successful?
A safe, repeatable capture with a known measurement point, correct scaling, and useful notes. Learning to obtain trustworthy evidence is more valuable than collecting a complicated screen of traces.
Prepare your MP608 workstation
Confirm the host device and test accessories you need, then keep the relevant manual available at the workstation.
Explore the Autel MP608 kit